
Types of DIY Stickers
There are many different types of DIY stickers that you can create. Here are some popular types:
- Vinyl stickers – These stickers are made from durable vinyl material that is resistant to fading, tearing, and water. They are commonly used for car decals, laptop stickers, or outdoor signage.
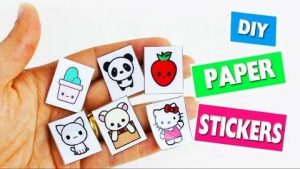
- Paper stickers – Paper stickers are the most common type of DIY stickers. They are easy to print and cut, and can be used for a wide range of applications such as labeling, packaging, or decorating.
- Clear stickers – Clear stickers are made from transparent vinyl material that allows your design to show through. They are great for creating a subtle or minimalist look on your laptop, phone case, or water bottle.
- Holographic stickers – Holographic stickers have a rainbow-like effect that changes color depending on the angle of the light. They are perfect for adding some sparkle and shine to your belongings.
- Die-cut stickers – Die-cut stickers are cut into custom shapes that fit your design. They can be created with a cutting machine or by hand, and can add some uniqueness and creativity to your stickers.
- Foil stickers – Foil stickers have a metallic or shiny finish that adds a luxurious or premium look to your design. They are great for special occasions, invitations, or gifts.
By experimenting with different types of DIY stickers, you can create unique designs that stand out and express your personality.
Vinyl stickers
Creating vinyl stickers is a great way to add some personalization and creativity to your belongings, and it’s easy to do with the right tools and materials. Here are the steps to create your own vinyl stickers:
Materials:
- Vinyl sheets
- Cutting machine (such as a Cricut or Silhouette)
- Transfer tape
- Weeding tool
- Scraper tool
Steps:
- Choose a design or image that you want to turn into a vinyl sticker. You can create your own design using a graphic design software, or use a pre-made design from a website or marketplace.
- Load the vinyl sheet into your cutting machine and adjust the settings to match the thickness and type of vinyl you are using.
- Send your design to the cutting machine and wait for it to finish cutting your design onto the vinyl sheet.
- Use a weeding tool to remove the excess vinyl around your design. This will leave only your design on the sheet.
- Cut a piece of transfer tape slightly larger than your design and place it over your design. Use a scraper tool to press down firmly on the tape, making sure it adheres to the vinyl.
- Carefully peel off the transfer tape, making sure that your design comes off with it. This will transfer your design onto the tape.
- Place the transfer tape with your design onto the surface where you want to apply your sticker. Use the scraper tool to press down firmly on the tape, making sure that the design adheres to the surface.
- Carefully peel off the transfer tape, leaving your vinyl sticker on the surface.
By following these simple steps, you can create your own vinyl stickers with ease. Experiment with different vinyl types, colors, and designs to create unique and personalized stickers for your belongings.
Paper stickers
Creating paper stickers is a fun and easy way to add some personalization to your belongings, and it can be done with just a few materials. Here are the steps to create your own paper stickers:
Materials:
- Printable sticker paper
- Printer
- Scissors or a cutting machine
- Clear tape (optional)
Steps:
- Choose a design or image that you want to turn into a sticker. You can create your own design using a graphic design software, or use a pre-made design from a website or marketplace.
- Open your design in a program that can print, like Adobe Illustrator or Canva. Make sure your design is high-quality and the right size for your sticker paper.
- Load your printable sticker paper into your printer and print your design. Follow the instructions on the package to ensure the best print quality.
- Use scissors or a cutting machine to cut out your stickers. Be careful not to damage the edges of your design.
- If you want your stickers to be more durable, cover them with a clear tape to protect them from scratches and water.
- Peel off the backing of your stickers and stick them wherever you like!
By following these simple steps, you can create your own paper stickers easily and quickly. Experiment with different designs, colors, and sizes to create unique and personalized stickers for your belongings.
Clear stickers
Creating clear stickers is a great way to add a subtle or minimalist touch to your belongings, and it’s easy to do with the right tools and materials. Here are the steps to create your own clear stickers:
Materials:
- Clear vinyl sheets
- Printer
- Scissors or a cutting machine
- Clear tape (optional)
Steps:
- Choose a design or image that you want to turn into a clear sticker. You can create your own design using a graphic design software, or use a pre-made design from a website or marketplace.
- Open your design in a program that can print, like Adobe Illustrator or Canva. Make sure your design is high-quality and the right size for your clear vinyl sheet.
- Load your clear vinyl sheet into your printer and print your design. Follow the instructions on the package to ensure the best print quality.
- Use scissors or a cutting machine to cut out your stickers. Be careful not to damage the edges of your design.
- Peel off the backing of your clear vinyl sheet to reveal the adhesive side.
- Carefully place your sticker onto the surface where you want to apply it. Use a scraper tool or your fingers to smooth out any air bubbles or wrinkles.
- If you want your stickers to be more durable, cover them with a clear tape to protect them from scratches and water.
By following these simple steps, you can create your own clear stickers with ease. Experiment with different designs, shapes, and sizes to create unique and personalized stickers for your belongings.
Holographic stickers
Creating holographic stickers is a fun and easy way to add some sparkle and shine to your belongings, and it can be done with just a few materials. Here are the steps to create your own holographic stickers:
Materials:
- Holographic vinyl sheets
- Cutting machine (such as a Cricut or Silhouette)
- Transfer tape
- Weeding tool
- Scraper tool
Steps:
- Choose a design or image that you want to turn into a holographic sticker. You can create your own design using a graphic design software, or use a pre-made design from a website or marketplace.
- Load the holographic vinyl sheet into your cutting machine and adjust the settings to match the thickness and type of vinyl you are using.
- Send your design to the cutting machine and wait for it to finish cutting your design onto the holographic vinyl sheet.
- Use a weeding tool to remove the excess vinyl around your design. This will leave only your design on the sheet.
- Cut a piece of transfer tape slightly larger than your design and place it over your design. Use a scraper tool to press down firmly on the tape, making sure it adheres to the vinyl.
- Carefully peel off the transfer tape, making sure that your design comes off with it. This will transfer your design onto the tape.
- Place the transfer tape with your design onto the surface where you want to apply your sticker. Use the scraper tool to press down firmly on the tape, making sure that the design adheres to the surface.
- Carefully peel off the transfer tape, leaving your holographic sticker on the surface.
By following these simple steps, you can create your own holographic stickers with ease. Experiment with different holographic vinyl types, colors, and designs to create unique and personalized stickers for your belongings.
Die-cut stickers
Creating die-cut stickers is a great way to add a unique and custom touch to your belongings. With the right tools and materials, you can https://www.buydo.eu easily make your own die-cut stickers. Here are the steps to create your own die-cut stickers:
Materials:
- Sticker paper or vinyl sheets
- Cutting machine (such as a Cricut or Silhouette)
- Transfer tape
- Weeding tool
- Scraper tool
Steps:
- Choose a design or image that you want to turn into a die-cut sticker. You can create your own design using a graphic design software, or use a pre-made design from a website or marketplace.
- Load the sticker paper or vinyl sheet into your cutting machine and adjust the settings to match the thickness and type of material you are using.
- Send your design to the cutting machine and wait for it to finish cutting your design onto the sticker paper or vinyl sheet.
- Use a weeding tool to remove the excess material around your design. This will leave only your design on the sheet.
- Cut a piece of transfer tape slightly larger than your design and place it over your design. Use a scraper tool to press down firmly on the tape, making sure it adheres to the paper or vinyl.
- Carefully peel off the transfer tape, making sure that your design comes off with it. This will transfer your design onto the tape.
- Place the transfer tape with your design onto the surface where you want to apply your sticker. Use the scraper tool to press down firmly on the tape, making sure that the design adheres to the surface.
- Carefully peel off the transfer tape, leaving your die-cut sticker on the surface.
By following these simple steps, you can create your own die-cut stickers with ease. Experiment with different sticker paper or vinyl types, colors, and designs to create unique and personalized stickers for your belongings.
Foil stickers
Creating foil stickers is a fun and creative way to add a metallic touch to your belongings. Here are the steps to create your own foil stickers:
Materials:
- Sticker paper or vinyl sheets
- Foil transfer sheets
- Cutting machine (such as a Cricut or Silhouette)
- Transfer tape
- Weeding tool
- Scraper tool
Steps:
- Choose a design or image that you want to turn into a foil sticker. You can create your own design using a graphic design software, or use a pre-made design from a website or marketplace.
- Load the sticker paper or vinyl sheet into your cutting machine and adjust the settings to match the thickness and type of material you are using.
- Send your design to the cutting machine and wait for it to finish cutting your design onto the sticker paper or vinyl sheet.
- Cut a piece of the foil transfer sheet slightly larger than your design and place it over your design, with the shiny side facing up. Use a scraper tool to press down firmly on the foil, making sure it adheres to the design.
- Carefully peel off the foil transfer sheet, making sure that the foil stays attached to the design. This will transfer the foil onto the design.
- Cut a piece of transfer tape slightly larger than your design and place it over your design. Use a scraper tool to press down firmly on the tape, making sure it adheres to the paper or vinyl.
- Carefully peel off the transfer tape, making sure that your design comes off with it. This will transfer your design with the foil onto the tape.
- Place the transfer tape with your design onto the surface where you want to apply your sticker. Use the scraper tool to press down firmly on the tape, making sure that the design adheres to the surface.
- Carefully peel off the transfer tape, leaving your foil sticker on the surface.
By following these simple steps, you can create your own foil stickers with ease. Experiment with different foil colors, sticker paper or vinyl types, and designs to create unique and personalized stickers for your belongings.