
Kinds
- Knit Hat and Scarf Set: A cozy knit set in a soft yarn is a great option for colder weather. You can choose from a variety of colors and patterns to match your child’s style.
- Fleece Hat and Scarf Set: A fleece set is perfect for those extra chilly days. They’re soft, warm, and come in a range of colors and designs.
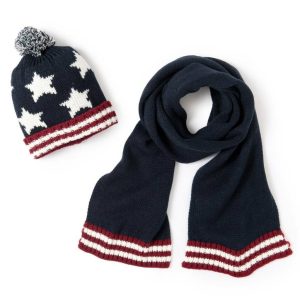
- Pom-Pom Hat and Scarf Set: A playful pom-pom hat and scarf set is a fun way to add some personality to your child’s winter wardrobe. You can choose from different colored pom-poms to match your child’s favorite color.
- Animal Hat and Scarf Set: Kids love animal-themed accessories, so why not get them an animal hat and scarf set? From cute bunnies to adorable pandas, there are plenty of options to choose from.
- Hooded Scarf and Hat Set: A hooded scarf and hat set is perfect for kids who love to play outside. It will keep them warm and cozy, while also protecting their head and neck from the cold.
Whatever set you choose, make sure it’s made from high-quality materials and fits your child comfortably.
Knit Hat and Scarf Set:
Knitted hats and scarves are a great way to keep children warm and stylish during the colder months. Here’s a general guide on how to create a set of knitted hat and scarf for children:
- Choose your yarn: Look for a soft and warm yarn that is suitable for children, such as acrylic or wool blends. Make sure to choose yarn in the colors that the child will love.
- Choose your needles: Depending on the yarn you select, choose the appropriate size of knitting needles. Check the label of the yarn for recommended needle size.
- Start with the scarf: Begin by casting on stitches for the scarf. You can decide the width and length based on the age of the child. Use a simple knit stitch or a rib stitch to create a pattern.
- Knit the hat: After finishing the scarf, start with the hat. Cast on the required number of stitches for the hat’s circumference. Use a circular needle or double-pointed needles to work in the round. You can choose to make the hat plain or add some texture or pattern to it.
- Add embellishments: Once the hat and scarf are finished, you can add pom-poms or tassels for an extra touch of style. Make sure to secure them well to avoid them falling off.
- Finishing touches: Finally, weave in all the ends and block the hat and scarf to make sure they keep their shape.
Remember to always keep safety in mind when making items for children. Avoid using small parts or anything that could be a choking hazard.
Fleece Hat and Scarf Set:
Sure, a set of fleece hat and scarf is also a great option to keep children warm during the colder months. Here’s a general guide on how to create a set of fleece hat and scarf for children:
- Choose your fleece fabric: Select a soft and warm fleece fabric that is suitable for children. You can choose a solid color or a patterned fabric.
- Measure and cut the fabric: Measure the child’s head circumference and add a few inches to allow for a comfortable fit. Cut the fleece fabric into a rectangular shape according to the desired length and width of the scarf. https://www.buydo.eu For the hat, cut two identical pieces of fabric in the shape of the child’s head circumference.
- Sew the scarf: Fold the fleece fabric in half lengthwise and sew the long edges together with a sewing machine or by hand. Turn the scarf right side out and finish the edges with a zigzag stitch or a serger.
- Sew the hat: Place the two pieces of fleece fabric right sides together and sew the sides together, leaving the bottom edge open. Turn the hat right side out and finish the bottom edge with a zigzag stitch or a serger.
- Add embellishments: You can add pom-poms, tassels, or other embellishments to the hat and scarf to make them more fun and personalized.
- Finishing touches: Trim any loose threads and check for any rough edges. You can also hand wash or machine wash the hat and scarf before wearing them.
Remember to always supervise children while they are wearing hats and scarves to avoid any choking or other safety hazards.
Pom-Pom Hat and Scarf Set:
A hat and scarf set with pompoms is a fun and playful way to keep children warm during the colder months. Here’s a general guide on how to create a hat and scarf set with pompoms for children:
- Choose your yarn: Select a soft and warm yarn that is suitable for children, such as acrylic or wool blends. Choose yarn in the colors that the child will love.
- Choose your needles: Depending on the yarn you select, choose the appropriate size of knitting needles. Check the label of the yarn for recommended needle size.
- Knit the scarf: Begin by casting on stitches for the scarf. You can decide the width and length based on the age of the child. Use a simple knit stitch or a rib stitch to create a pattern. When you’re almost finished, make two large pompoms in the same yarn and attach one to each end of the scarf.
- Knit the hat: After finishing the scarf, start with the hat. Cast on the required number of stitches for the hat’s circumference. Use a circular needle or double-pointed needles to work in the round. You can choose to make the hat plain or add some texture or pattern to it. When you’re almost finished, make a large pompom in the same yarn and attach it to the top of the hat.
- Finishing touches: Finally, weave in all the ends and block the hat and scarf to make sure they keep their shape.
Remember to always keep safety in mind when making items for children. Avoid using small parts or anything that could be a choking hazard. Make sure the pompoms are securely attached to the hat and scarf to avoid them falling off.
Animal Hat and Scarf Set:
A set of hats and scarves with the image of animals is a fun and creative way to keep children warm and entertained during the colder months. Here’s a general guide on how to create a set of hats and scarves with animal images for children:
- Choose your yarn: Select a soft and warm yarn that is suitable for children, such as acrylic or wool blends. Choose yarn in the colors that match the animals you want to create.
- Choose your needles: Depending on the yarn you select, choose the appropriate size of knitting needles. Check the label of the yarn for recommended needle size.
- Choose your animal images: Decide which animals you want to create and find images online or in books to use as inspiration.
- Knit the scarf: Begin by casting on stitches for the scarf. You can decide the width and length based on the age of the child. Use a simple knit stitch or a rib stitch to create a pattern. To create the animal images, you can use intarsia or fair isle techniques to knit in the different colors and shapes.
- Knit the hat: After finishing the scarf, start with the hat. Cast on the required number of stitches for the hat’s circumference. Use a circular needle or double-pointed needles to work in the round. To create the animal images, you can use the same intarsia or fair isle techniques used in the scarf.
- Add embellishments: Once the hat and scarf are finished, you can add eyes, noses, ears, and other details to make the animal images come to life. You can use felt, embroidery, or other materials to create these embellishments.
- Finishing touches: Finally, weave in all the ends and block the hat and scarf to make sure they keep their shape.
Remember to always keep safety in mind when making items for children. Avoid using small parts or anything that could be a choking hazard. Make sure the embellishments are securely attached to the hat and scarf to avoid them falling off.
Hooded Scarf and Hat Set:
A set of a scarf and a hat with a hood is a practical and cozy way to keep children warm during the colder months. Here’s a general guide on how to create a set of a scarf and a hat with a hood for children:
- Choose your fabric: Select a soft and warm fabric that is suitable for children, such as fleece or wool blends. Choose fabric in the colors that the child will love.
- Measure and cut the fabric: Measure the child’s head circumference and add a few inches to allow for a comfortable fit. Cut the fabric into two identical pieces for the hood. For the scarf, cut a rectangular shape of the desired length and width.
- Sew the hood: Place the two pieces of fabric right sides together and sew the sides and top together, leaving the bottom edge open. Turn the hood right side out and finish the bottom edge with a zigzag stitch or a serger.
- Sew the scarf: Fold the fabric in half lengthwise and sew the long edges together with a sewing machine or by hand. Turn the scarf right side out and finish the edges with a zigzag stitch or a serger.
- Sew the hat: Cut a piece of fabric in the shape of the child’s head circumference plus a few inches for seam allowance. Fold the fabric in half and sew the sides together, leaving the bottom edge open. Attach the hood to the hat by sewing it to the back edge of the hat.
- Finishing touches: Trim any loose threads and check for any rough edges. You can also hand wash or machine wash the hat and scarf before wearing them.
Remember to always supervise children while they are wearing hoods and scarves to avoid any choking or other safety hazards. Make sure the hood fits securely and comfortably around the child’s head.